Deploying to OpenStack from AgnosticD OSP Sandbox
Overview
Whilst this blog article/lab is aimed primarily at Red Hatters, and partners, who can self provision an OpenStack (OSP) Sandbox via Red Hat’s RHPDS it may also be useful to others working both with OpenStack and Ansible Agnostic Deployer aka AgnosticD. I’ll follow this up, shortly, with a second blog article repeating the same exercise but deploying from a laptop running Linux or macOS.
I’ll assume you have either self provisioned, or been provided with, an OpenStack Sandbox instance and have the necessary ssh login details etc.
For the purpose of this exercise we’ll use the AgnosticD config just-some-nodes-example which is simple to deploy, and extensible for anyone looking to deploy some instances on OpenStack.
Deployment Stages
Deployment can be divided logically into 6 short and stages. In the course of this blog we’ll work our way through each stage:
-
Validating the OSP Sandbox instance can communicate with OpenStack
-
Validating the Ansible AgnosticD deployer
-
Creating a python virtualenv for working with OpenStack
-
Preparing your secrets, and credentials, for OpenStack
-
Preparing your just-some-nodes-example vars
-
Deploying your just-some-nodes-example config
|
Note
|
For the following code examples I’ve simplified them and removed the prompt, which varies on login id, for example my: |
[jsnow-example.com@bastion ~]$ openstack project listis simply written as the command itself.
openstack project list1. Validating the OSP (OpenStack Platform) Sandbox instance can communicate with OpenStack
Validating the clientVM can communicate with OpenStack
Before going further lets just validate your OSP ClientVM can actually talk to an OpenStack Cluster. We’ll re-visit in section 3 how that authenticated for those of you not too familiar with OpenStack.
-
Typically you’ll have received an email with your login credentials to your clientVM. If you deployed this yourself directly via AgnosticD then it’s pretty safe to assume you know how to get to your clientVM
ssh jsnow-example.com@bastion.tok-9408.example.com -
Execute a simple
openstackcommand. Theopenstackcli is pre-installed and will pick up both your credentials and API endpoint from~/.config/openstack/clouds.yaml, but more of that later.openstack project listExpect to see your project listed
+----------------------------------+------------------+ | ID | Name | +----------------------------------+------------------+ | 07307112287a4f8eaf4b0cfbc879e2af | tok-9408-project | +----------------------------------+------------------+ -
If the above fails ensure you have both the OpenStack CLI client and a
clouds.yamlin~/config/openstack/clouds.yaml
Resource: OpenStack CLI Cheatsheet
2. Cloning and validating the Ansible AgnosticD deployer
The Sandbox instance currently comes with AgnosticD pre-cloned in your home directory, and at this writing belonging to root, something I hope to change shortly.
-
Optional if you plan to update, modify, or branch the AgnosticD repo then you will need to change the ownership of
agnosticdto your user.sudo chown -R $(whoami):users ~/agnosticd -
For simplicity cd into the
agnosticd/ansibledirectory. You can explore the main playbooks, therolesdirectory, and theconfigsdirectory where AgnosticD gets it’s recipes to deploy both infrastructure and workloads across multiple Cloud Providers and OpenShift.cd ~/agnosticd/ansible/ -
Execute the ansible deployer playbook
main.ymlwith the test config calledtest-empty-config.ansible-playbook main.yml -e @configs/test-empty-config/sample_vars.ymlNoteThe -e @configs/test-empty-config/sample_vars.ymlsyntax tellsansible-playbookto load the vars in that configssample_vars.ymlfile. This is a common pattern and used widely with AgnosticD. This is how you will customize your configs going forward.Expect to see the ansible logs, which may include skipped tasks and plays, complete successfully
<output truncated>
...
PLAY RECAP **************************************************************************
localhost  : ok=29 changed=2  unreachable=0  failed=0  skipped=13 rescued=0 ignored=0
<output truncated>
...
At this point we have now confirmed that the Sandbox can both communicate with OpenStack and can also execute an, albeit simple, AgnosticD config which in fact doesn’t create any instances.
-
Before continuing make sure you are back in your Home Directory
cd
3. Creating a Python virtualenv for working with OpenStack
Ansible is written in Python and requires certain dependencies to work with cloud
platforms. In this case it uses a python package called openstacksdk and others
depending on the config being deployed.
Particularly as we transition from Python 2 to Python 3 the optimal way to work is to use a python virtualenv to isolate your environment. We will be using Python3 given the EOL of Python 2.
|
Note
|
Both Python 2 and 3 are installed and the default Python on the current
RHEL 7.7 instance is Python 2 as can be seen if you execute python --version
|
-
Create a virtualenv, called
openstacktaking care to usepython3.python3 -m venv openstackNoteThere are a number of ways to create virtualenvs, see here for my earlier article Lab: Ansible, Python3, and Virtualenvs on CentOS and RHEL If you are going to be using them a lot I recommend working through that article as virtualenvwrappermakes them more manageable. -
Activate the virtualenv, (you will need to do this every-time you login).
source openstack/bin/activateNote: Your prompt will now change to indicate the virtualenv has been activated. e.g.
(openstack) [jsnow-example.com@bastion ~]$ -
Upgrade pip, the python package manager, to the latest.
pip install -U pip -
Install the 4 python packages you will need for your config:
ansible,openstacksdk,selinuxanddnspython. Each will pull in any necessary secondary dependencies.pip install ansible openstacksdk selinux dnspythonNoteYou can list all the installed packages with pip listand if you wish to transfer them to another machine it is common pattern to capture them withpip freeze > requirements.txtand to install on say your local machine via transferring the file (typically via a git pull) andpip install -r requirements.txt. This will create a matching environment on your local machine. -
Validate your new virtualenv can communicate, via ansible, with OpenStack.
ansible localhost -m os_authExpect a successful outcome listing of JSON services and API endpoints with no error message ending similar to this, but with different IP addresses etc:
... <output omitted>
         "id": "e16b5c31e5164d779923cb2edca1b3bf",
                        "interface": "public",
                        "region": "regionOne",
                        "region_id": "regionOne",
                        "url": "http://10.0.0.1:8989/v2"
                    }
                ],
                "id": "e9fecb791909428db26dc9927b97af94",
                "name": "mistral",
                "type": "workflowv2"
            }
        ]
    },
    "changed": false
}
4. Preparing your secrets and credentials for OpenStack
There are a number of ways to find, and authenticate to, OpenStack APIs. So far
both the openstack command you used in Stage 1 and the Ansible ad-hoc command
you just executed using the os_auth module found the necessary meta data via
a clouds.yaml file. In this particular case here: ~/.config/openstack/clouds.yaml.
-
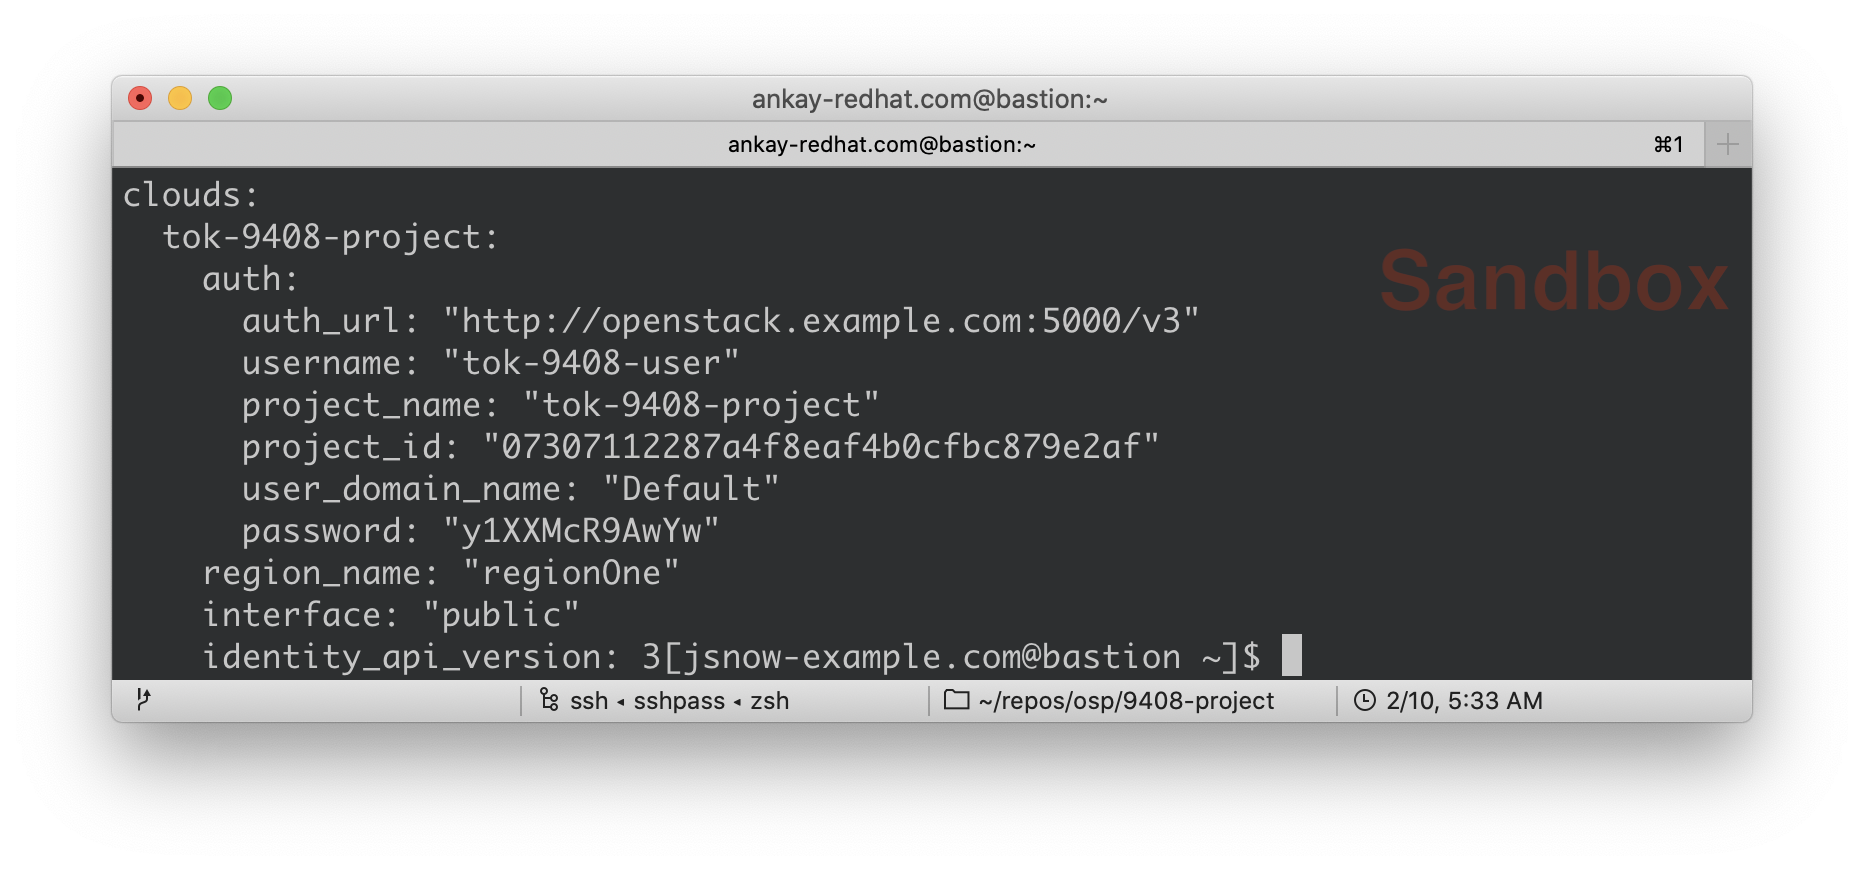
Optional Take a look at your
clouds.yaml(which may also have been emailed to you). Again your values may differcat ~/.config/openstack/clouds.yamlYour output will differ (and my credentials have been deleted!)
clouds:
  tok-9408-project:
    auth:
      auth_url: "http://openstack.example.com:5000/v3"
      username: "tok-9408-user"
      project_name: "tok-9408-project"
      project_id: "07307112287a4f8eaf4b0cfbc879e2af"
      user_domain_name: "Default"
      password: "y1XXMcR9AwYw"
    region_name: "regionOne"
    interface: "public"
    identity_api_version: 3
Whilst Ansible itself can use clouds.yaml via the openstacksdk package
you pip installed earlier AgnosticD actually uses a different way of
authenticating to OpenStack via vars expressed in YAML. Fortunately your environment has been, largely,
pre-configured via a file located at ~/.secrets.yml
-
Examine your
~/.secrets.ymlcat ~/.secrets.yamlAgain your values will differ
osp_auth_project_domain: default osp_auth_user_domain: default # dynamic DNS ddns_key_name: example_students ddns_key_secret: very-secret osp_cluster_dns_server: ddns01.example.com osp_cluster_dns_zone: students.osp.example.com osp_auth_username: "tok-9408-user" osp_auth_password: "y1XXMcR9AwYw" osp_auth_url: "http://openstack.example.com:5000/v3" osp_project_name: "tok-9408-project" osp_project_id: 07307112287a4f8eaf4b0cfbc879e2af" osp_project_create: false(openstack) -
I prefer to make a copy of the file to hold other secrets we’ll need in the next section and also to make it more visible.
cp ~/.secrets.yml ~/secrets.ymlImportantIf you are using a yum server via own_repo_pathor have other sensitive variables for your deployment it makes sense to add them to your new~/secrets.ymlfile. If you are doing a workshop your instructor or facilitator can often supply these.
5. Preparing your just-some-nodes-example vars
Almost ready. The AgnosticD config just-some-nodes-example comes with sample
vars files included for OpenStack, locally at ~/agnosticd/ansible/configs/just-some-nodes-example/default_vars_osp.yml
(or online here). Only a few variables need changed.
-
Make a local copy of the sample OpenStack (OSP) vars file
cp ~/agnosticd/ansible/configs/just-some-nodes-example/sample_vars_osp.yml ~/vars.yml -
Edit your copy of the vars file, changing the value of
guidto a valid subdomain name (For example an alphanumeric string starting with a letter).vim ~/vars.yml
Configuration is now complete.
6. Deploying your just-some-nodes-example config
Now, assuming you’ve correctly configured your vars files, it’s time to deploy. (Make sure your virtualenv is active, your prompt should start `(openstack) `
-
Execute the main AgnosticD playbook
cd ~/agnosticd/ansible ansible-playbook main.yml -e @~/vars.yml -e @~/secrets.yml -
Watch the log files. The above deployment should "just work" but the 2 most common errors that may be seen are:
-
Missing or incorrect variables
-
Missing python dependencies
... PLAY RECAP ************************************************************************ bastion : ok=37 changed=23 unreachable=0 failed=0 skipped=21 rescued=0 ignored=0 localhost : ok=64 changed=11 unreachable=0 failed=0 skipped=28 rescued=0 ignored=0 node : ok=21 changed=10 unreachable=0 failed=0 skipped=17 rescued=0 ignored=0 ... -
-
Finding your new servers
In the logs that scrolled by you may have noticed the IP address of your new bastion server. This, and your other instance(s), have been captured in a temporary working directory, the
output_dirset in your~/vars.ymlfile typically set to/tmp/output_dir. This contains, amongst other files, ansshconfiguration file.Append this file to your existing~/.ssh/configcat /tmp/output_dir/*_ssh_conf >> ~/.ssh/config -
Now you can ssh to either of your new servers
ssh bastionorssh node
ssh bastion
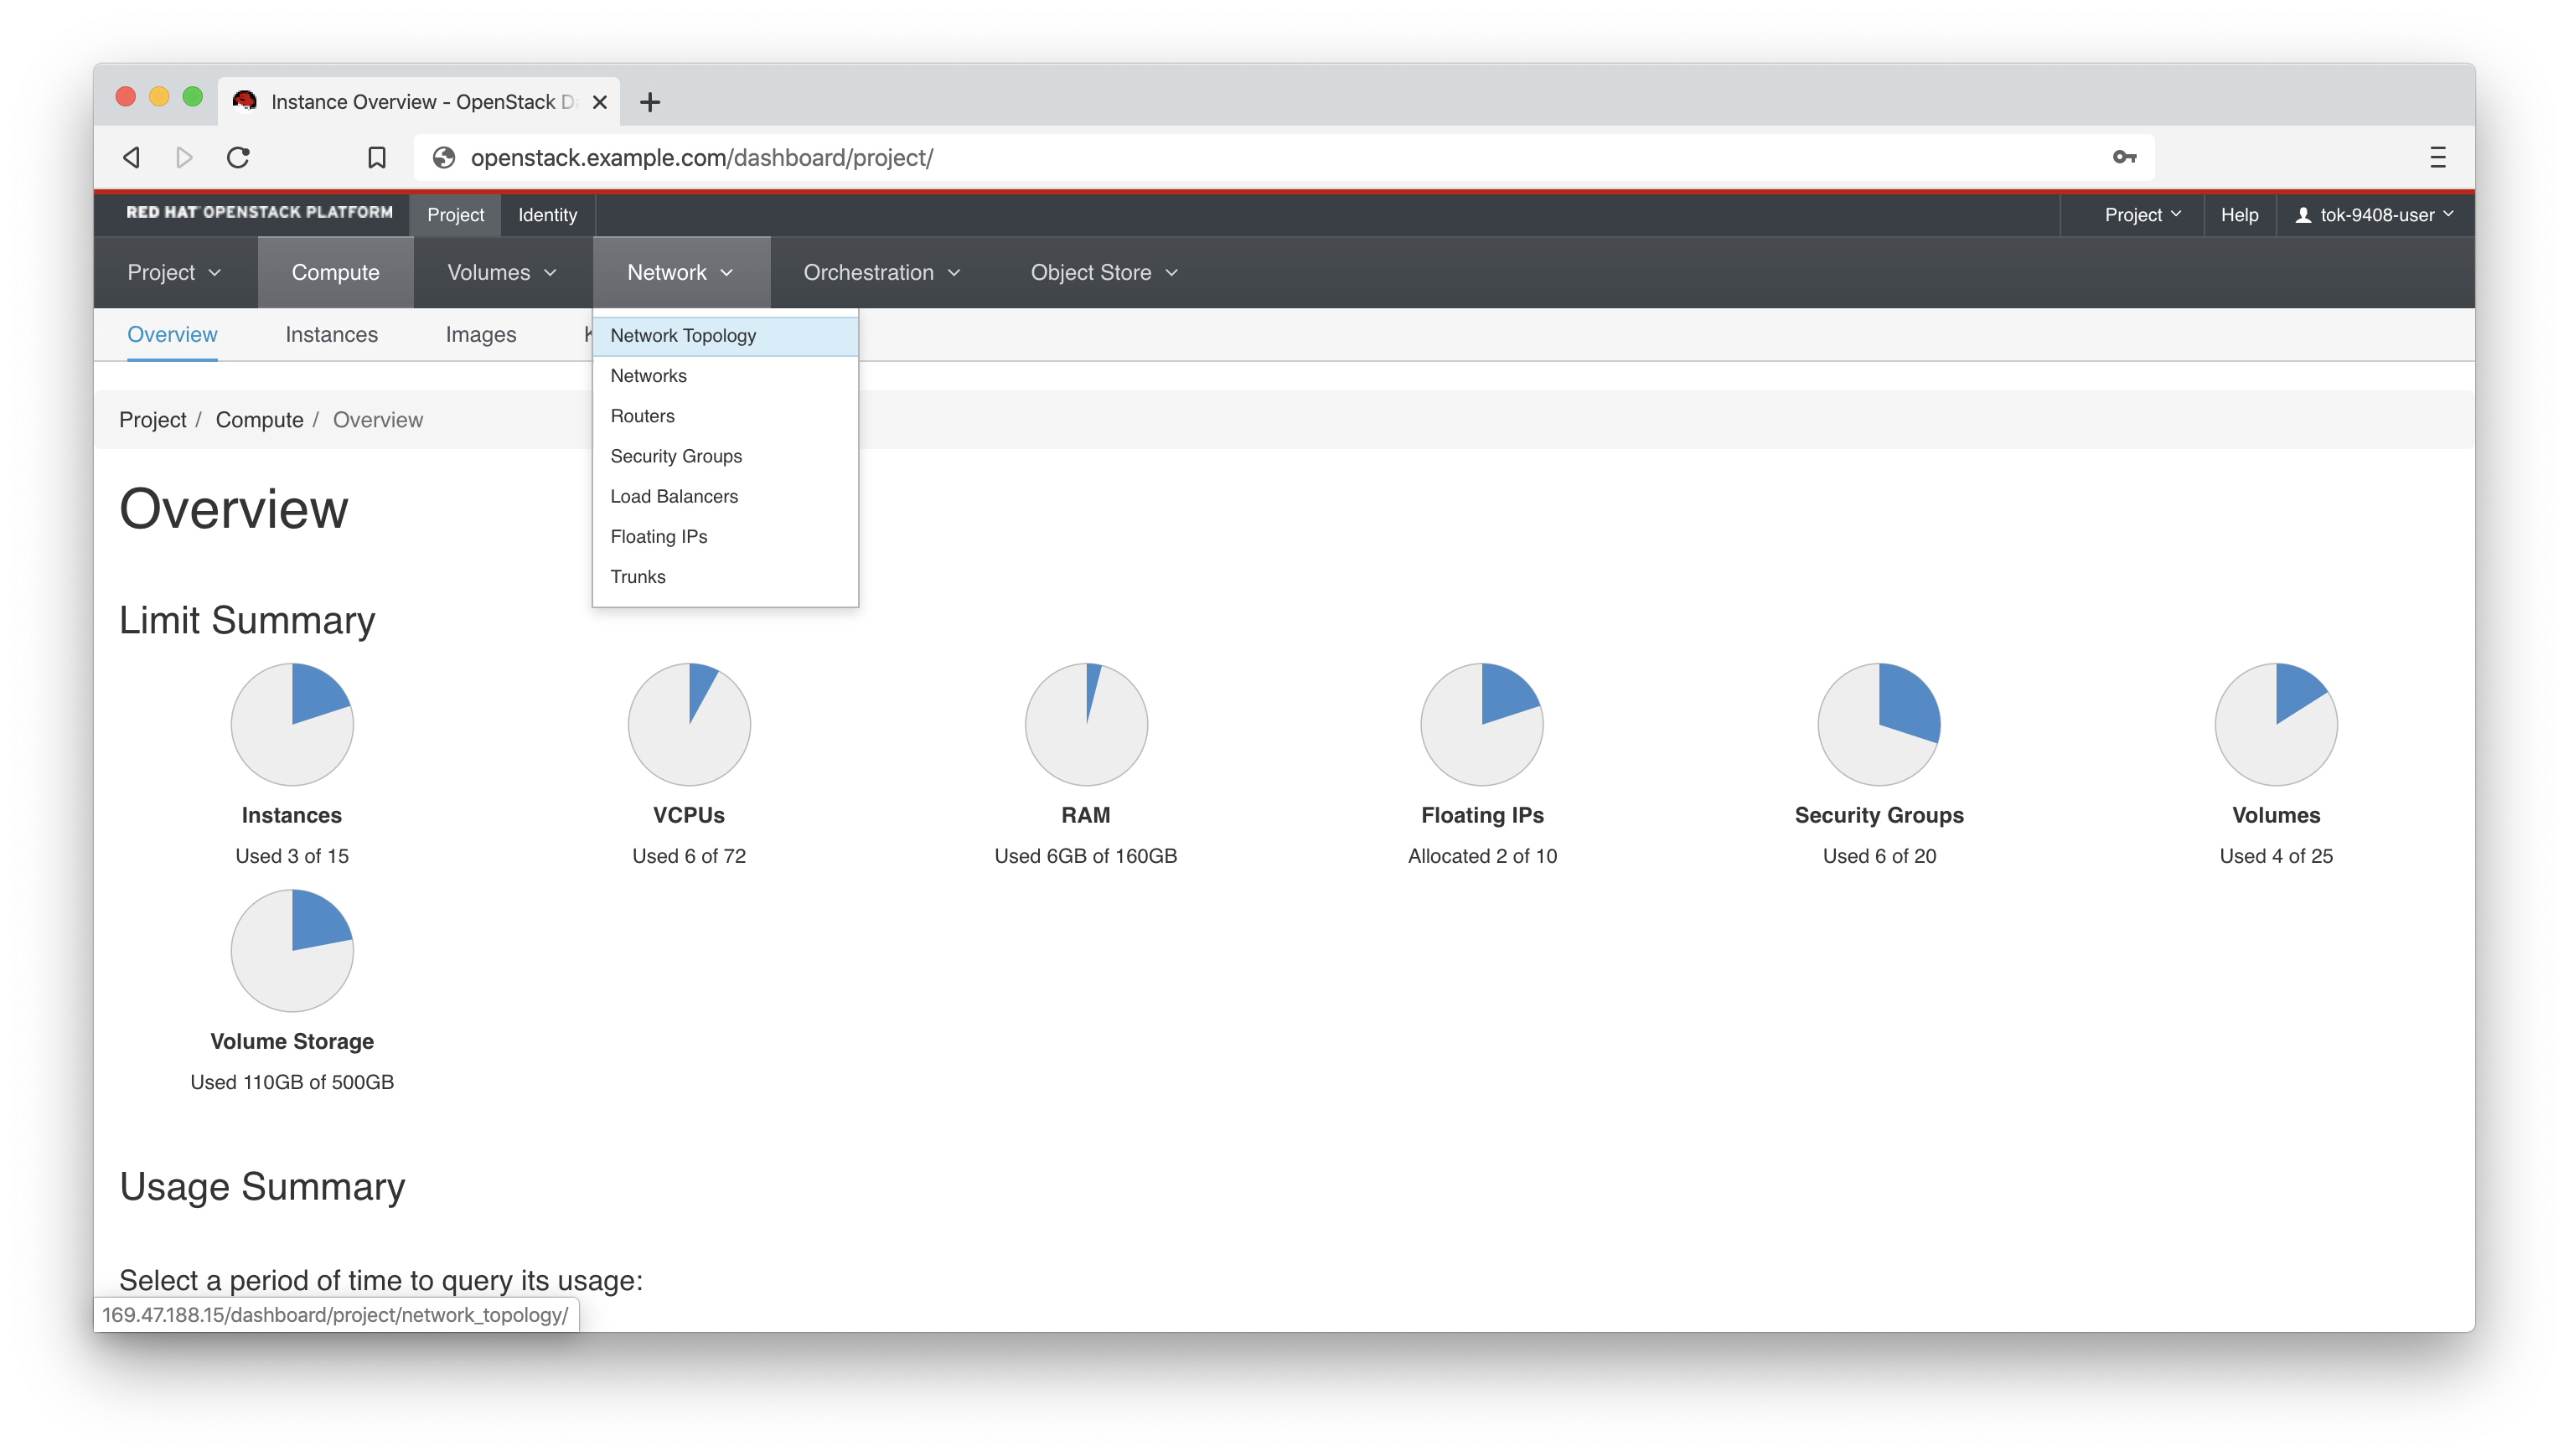
Bonus - See your Deployment
OpenStack has an web front end Horizon and both your secrets.yml and ~/.config/clouds.yml contain the necessary login information:
-
Find your credentials and URL
cat ~/secrets.ymlAgain your file will differ slightly
osp_auth_project_domain: default osp_auth_user_domain: default # dynamic DNS ddns_key_name: example_students ddns_key_secret: very-secret osp_cluster_dns_server: ddns01.example.com osp_cluster_dns_zone: students.osp.example.com osp_auth_username: "tok-9408-user" (1) osp_auth_password: "y1XXMcR9AwYw" (2) osp_auth_url: "http://openstack.example.com:5000/v3" (3) osp_project_name: "tok-9408-project" osp_project_id: 07307112287a4f8eaf4b0cfbc879e2af" osp_project_create: false -
Browse to the Domain name or IP address in 3
osp_auth_urlomitting everything from the:i.e. in my case:"http://openstack.example.com -
Authenticate with the username and password at 1 and 2 above, ie.g. for me:
tok-9408-user    # Username
y1XXMcR9AwYw     # Password

-
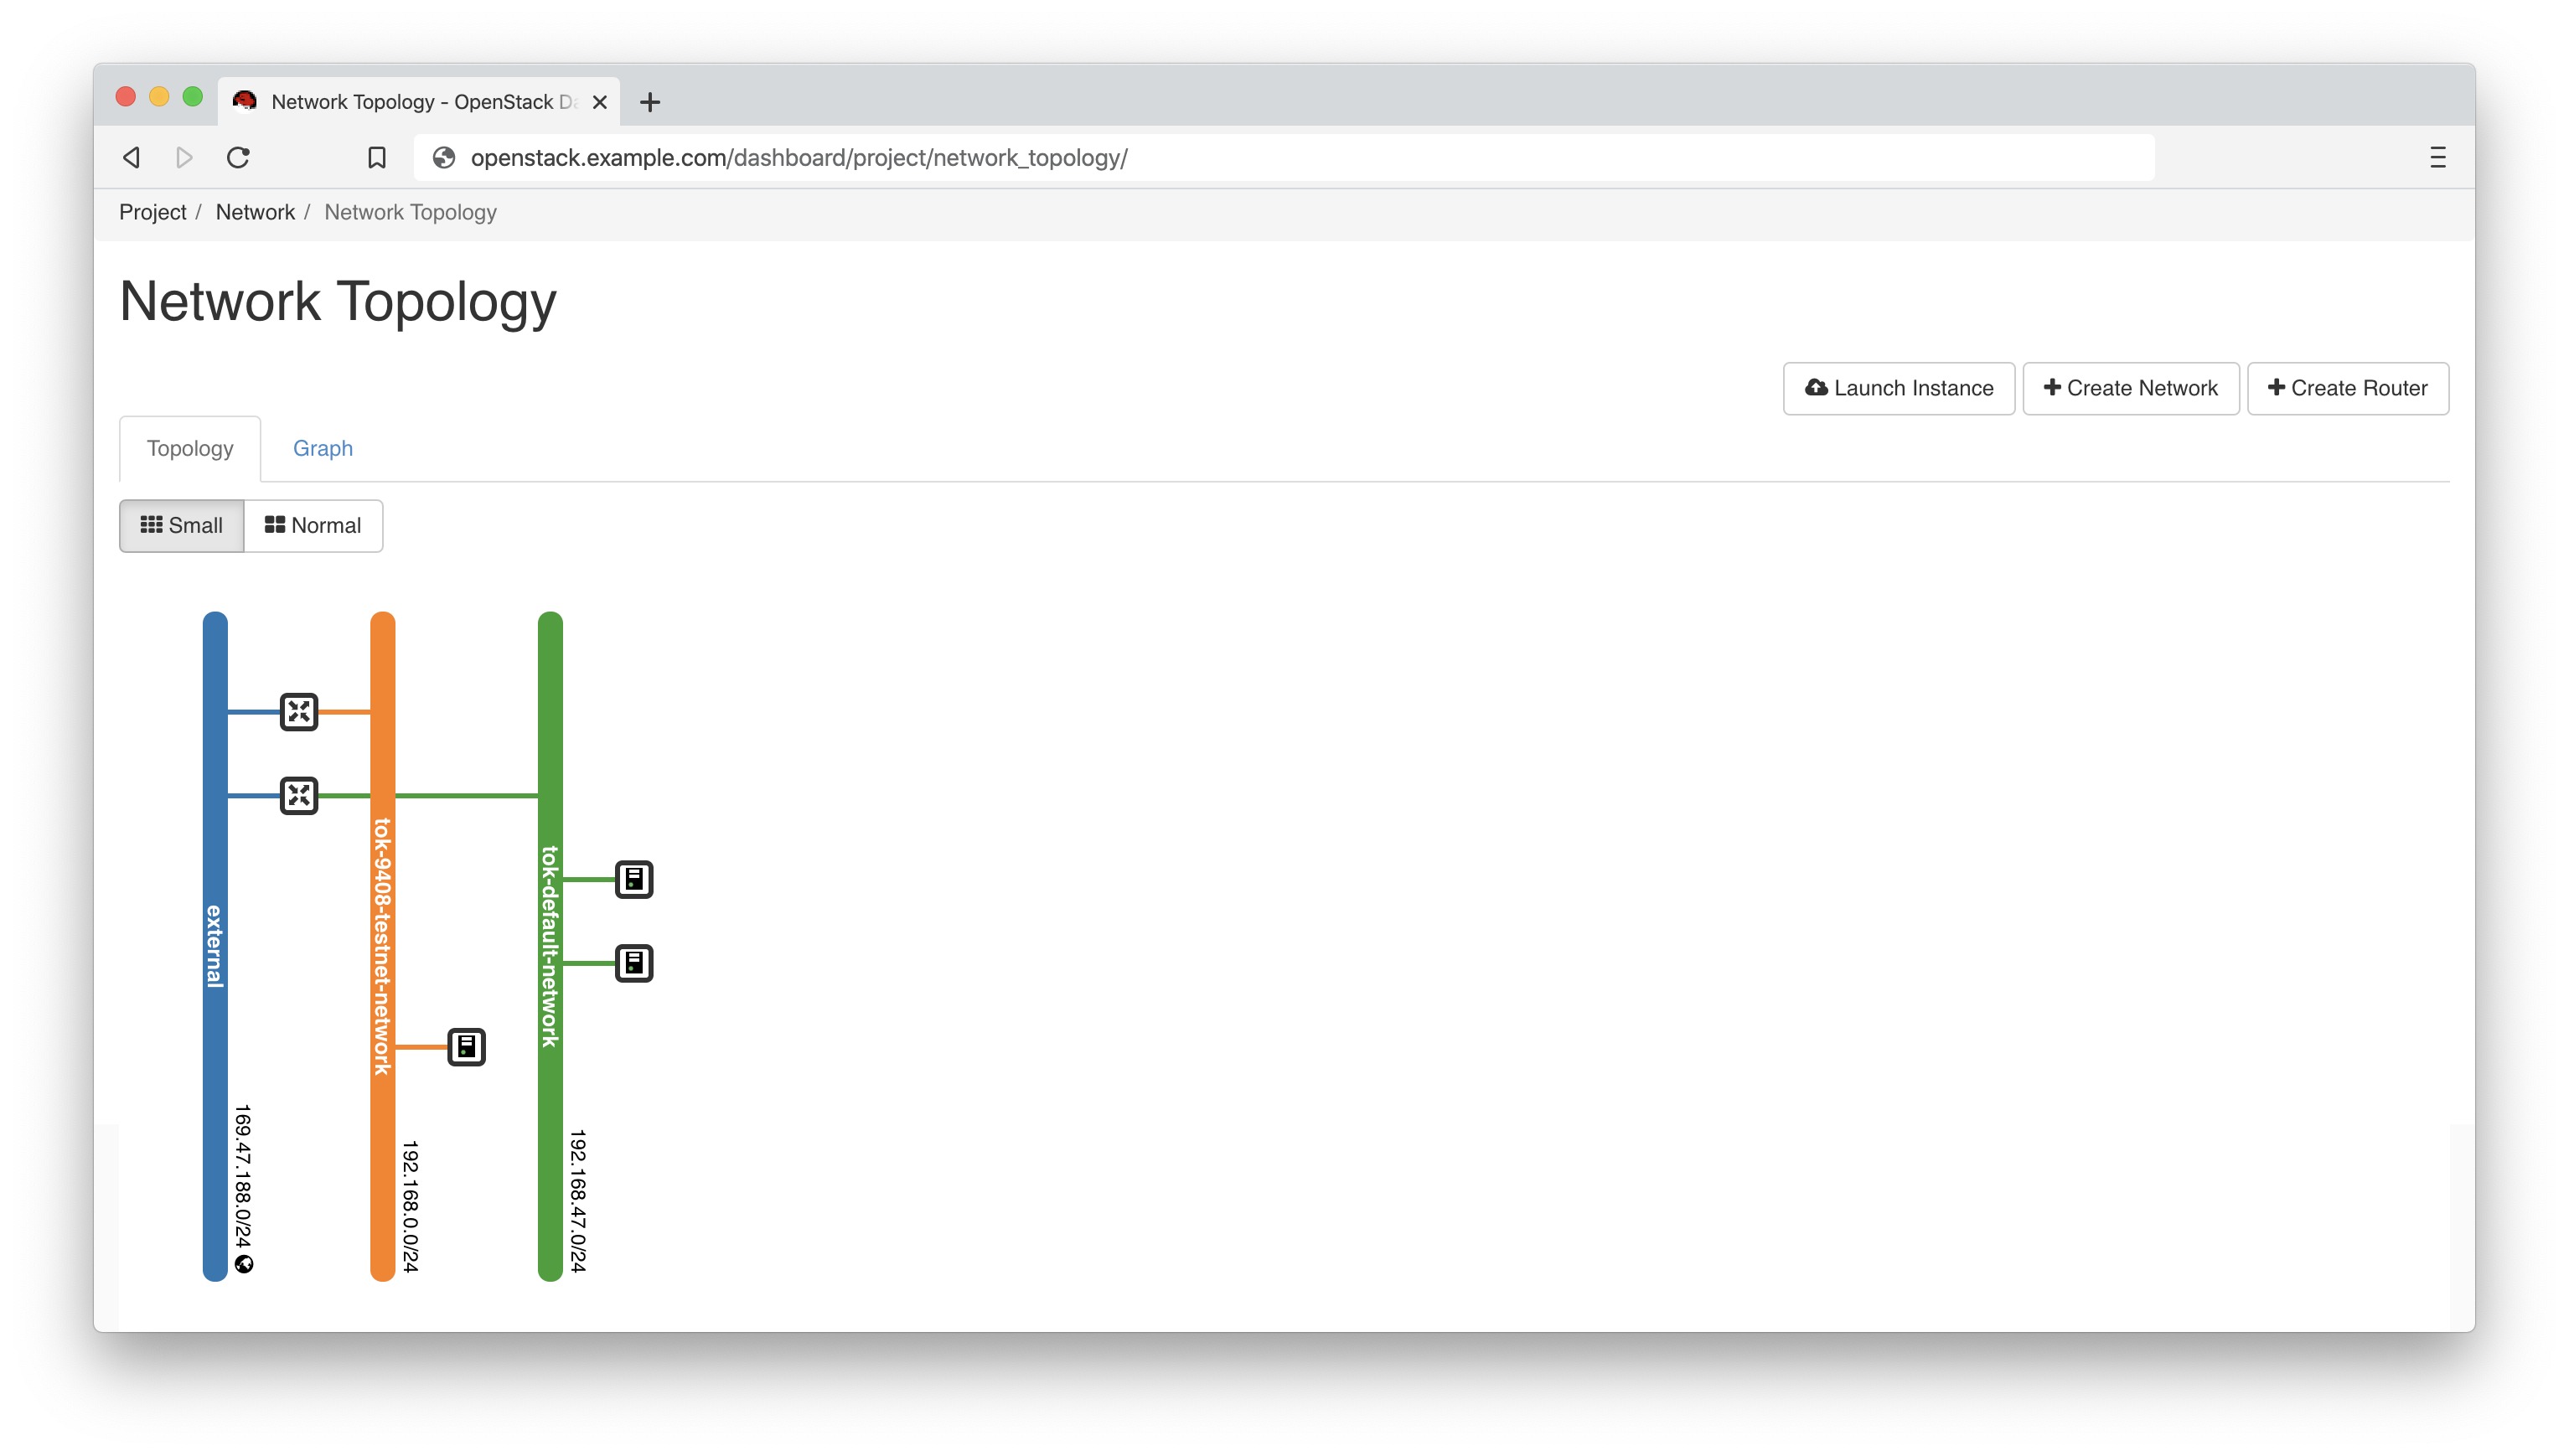
Select the Network Dropdown then Network Topology
-
There is your original Sandbox Instance and your new bastion and node
Troubleshooting
-
openstacksdknot installed:localhost | FAILED! => { "changed": false, "msg": "openstacksdk is required for this module" }Occasionally this is seen, even at times when
pipshows the package is actually installed in the correct location-
Ensure you have activated your virtualenv
-
Your prompt should start `(openstack) `
-
If not:
source ~/openstack/bin/activate
-
-
Still failing?
-
Delete the virtualenv
rm -rf ~/openstack -
Recreate the virtualenv and activate, by repeating all of Stage 3 above
-
-