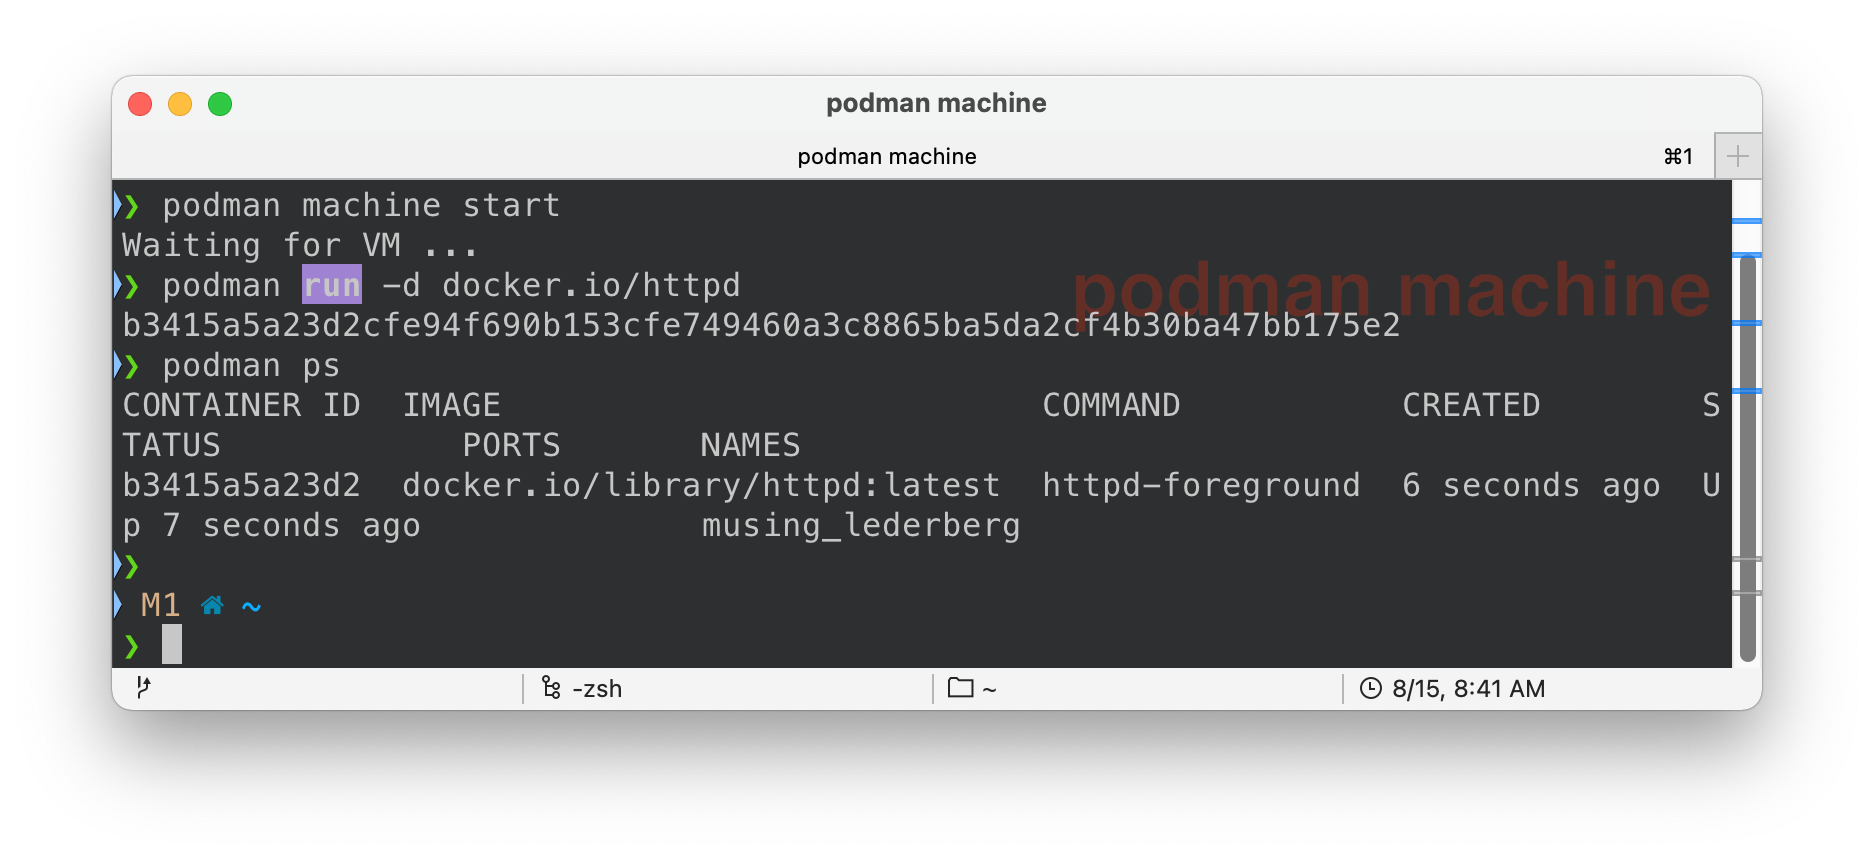
TL:DR Patch and compile qemu on the Apple M1 to run podman machine smoothly and without errors. If you are in a hurry you can simply copy and paste your way through the code snippets below but be aware you are making changes to your toolchain and qemu.
Overview Since I use both podman and docker frequently on a mix of x86 and ARM I was very happy when podman 3.
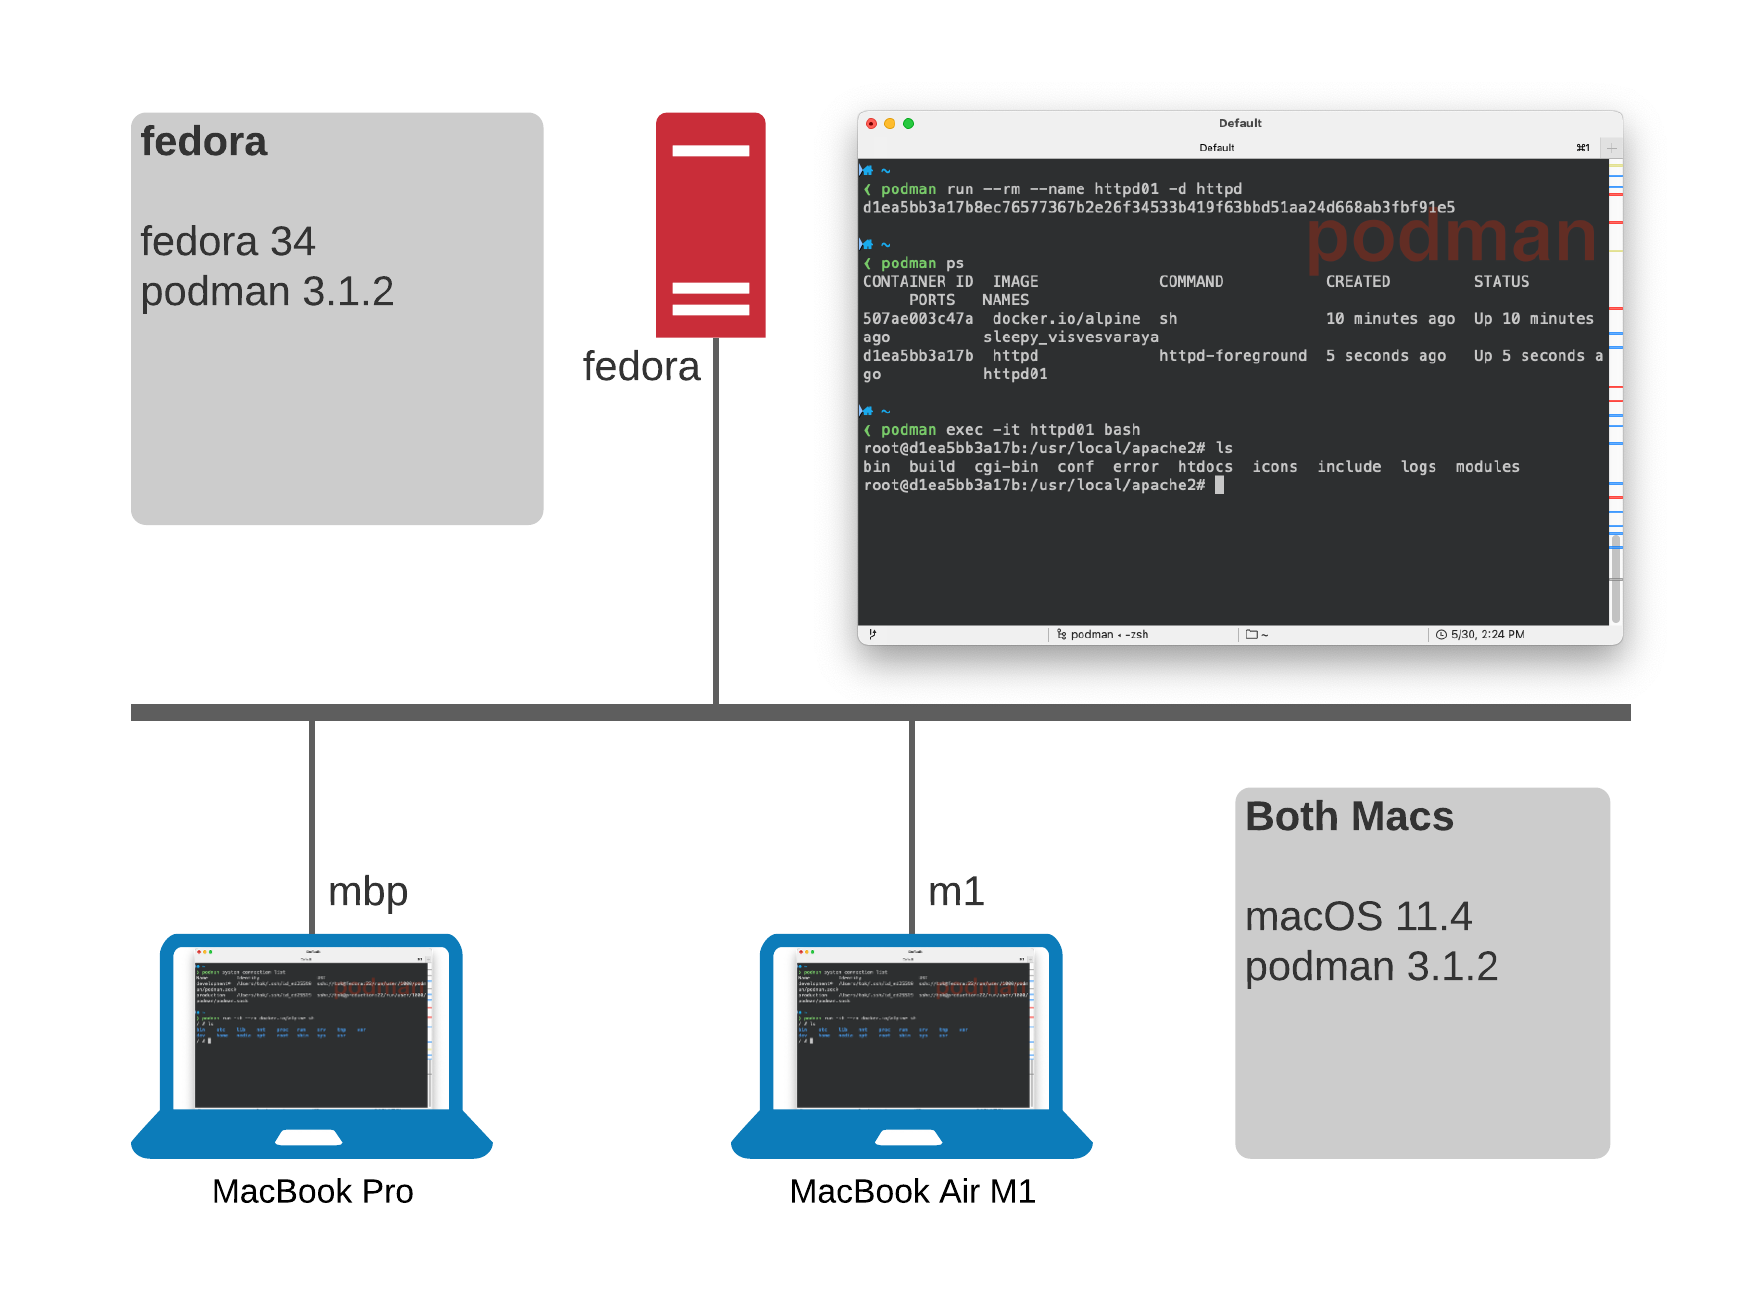
Overview Setup up a Linux instance to act as a podman server allowing you to run podman and podman-compose commands remotely. So for example you can develop on a Mac, but run containers via podman and podman-compose at least some of the time. This article will show you how to:
Setup a remote podman server (RHEL, Fedora, CentOS - Ubuntu should just be package changes)
Setup podman remote client on your Mac (Should work for Windows and Linux too)
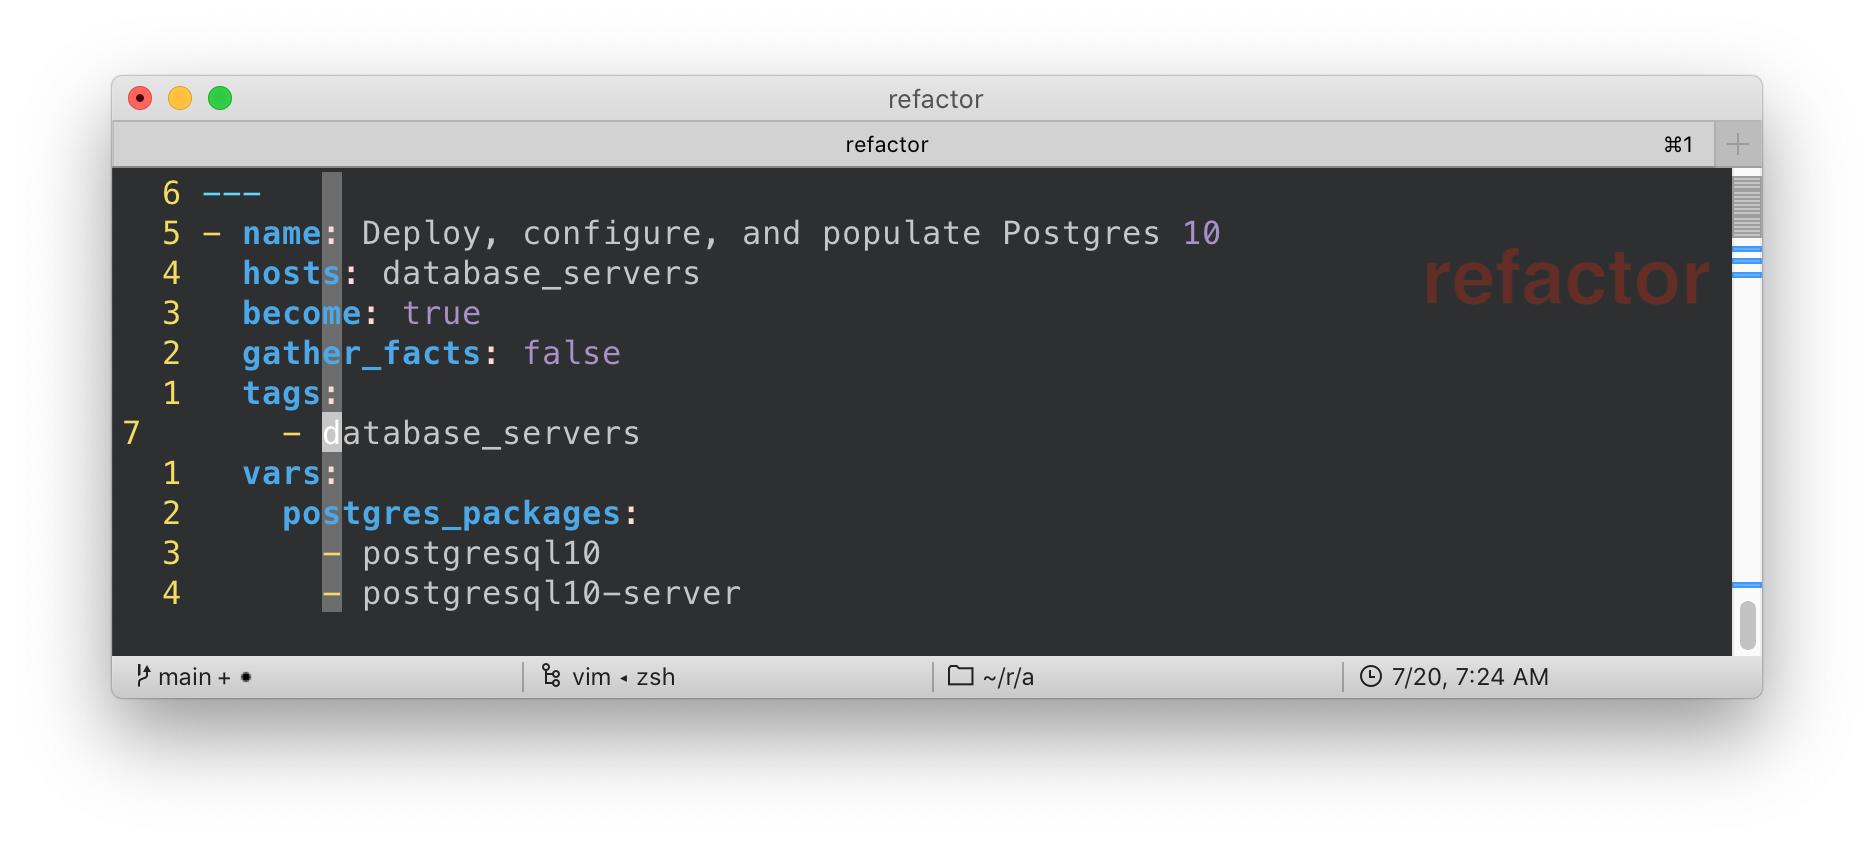
Part 4 - Roles Refactor This is Part 4 of an Ansible Refactoring Series - Start Here
In our second pass through the project we will take the now more modular solution a step further and break it into roles. In this case we will basically map each of the 3 playbooks from Part 3 into 1 role each
Process Create a new branch refactor-pass-02-roles
Create a roles sub-directory in the repo
Part 3 - First Refactor This is Part 3 of an Ansible Refactoring Series - Start Here
In our first pass through the project we will just focus on breaking it up into more modular components, breaking apart the variables from the code, and cleaning up the base directory by moving out any files or templates into sub-directories. If you are Jeff Geerling and very comfortable with writing roles and collections then this part can be skipped!
Part 2 - First Deploy Now your environment is setup and customized it is time to clone, examine, and run your project repository or repo.
Simple Multi-Tier Application Overview The repo contains a simple, monolithic, playbook main.yml that deploys a multi-tier application serving both a web site and it’s associated API.
The Application comprises 3 main components, or tiers, which can be deployed onto the lab infrastructure. There is also a control node to work from.
Part 1 - Getting Started This is Part 1 of an Ansible Refactoring Series - Start Here
To follow along I assume you have access to a lab environment suitable for the task. I will add, July 2020, a Vagrantfile to simplify running this locally on your laptop. Meanwhile this can be deployed via the brand new Ansible Multitier Infra Config assuming you have AWS credentials or OpenStack.
ansible-playbook main.
Refactoring Ansible Modularity, Reuse, and Maintainability In this series I want to explore refactoring a good, or at least decent, monolithic application deployment playbook into something more modular, easier to maintain, and with simpler and better reusability We’ll start by validating it works before our first pass at simply breaking it into more modular playbooks and separating out the variables.
Moving on we’ll identify what if any components would be be better off suited to roles and consider using one or more existing roles from Ansible Galaxy if appropriate.
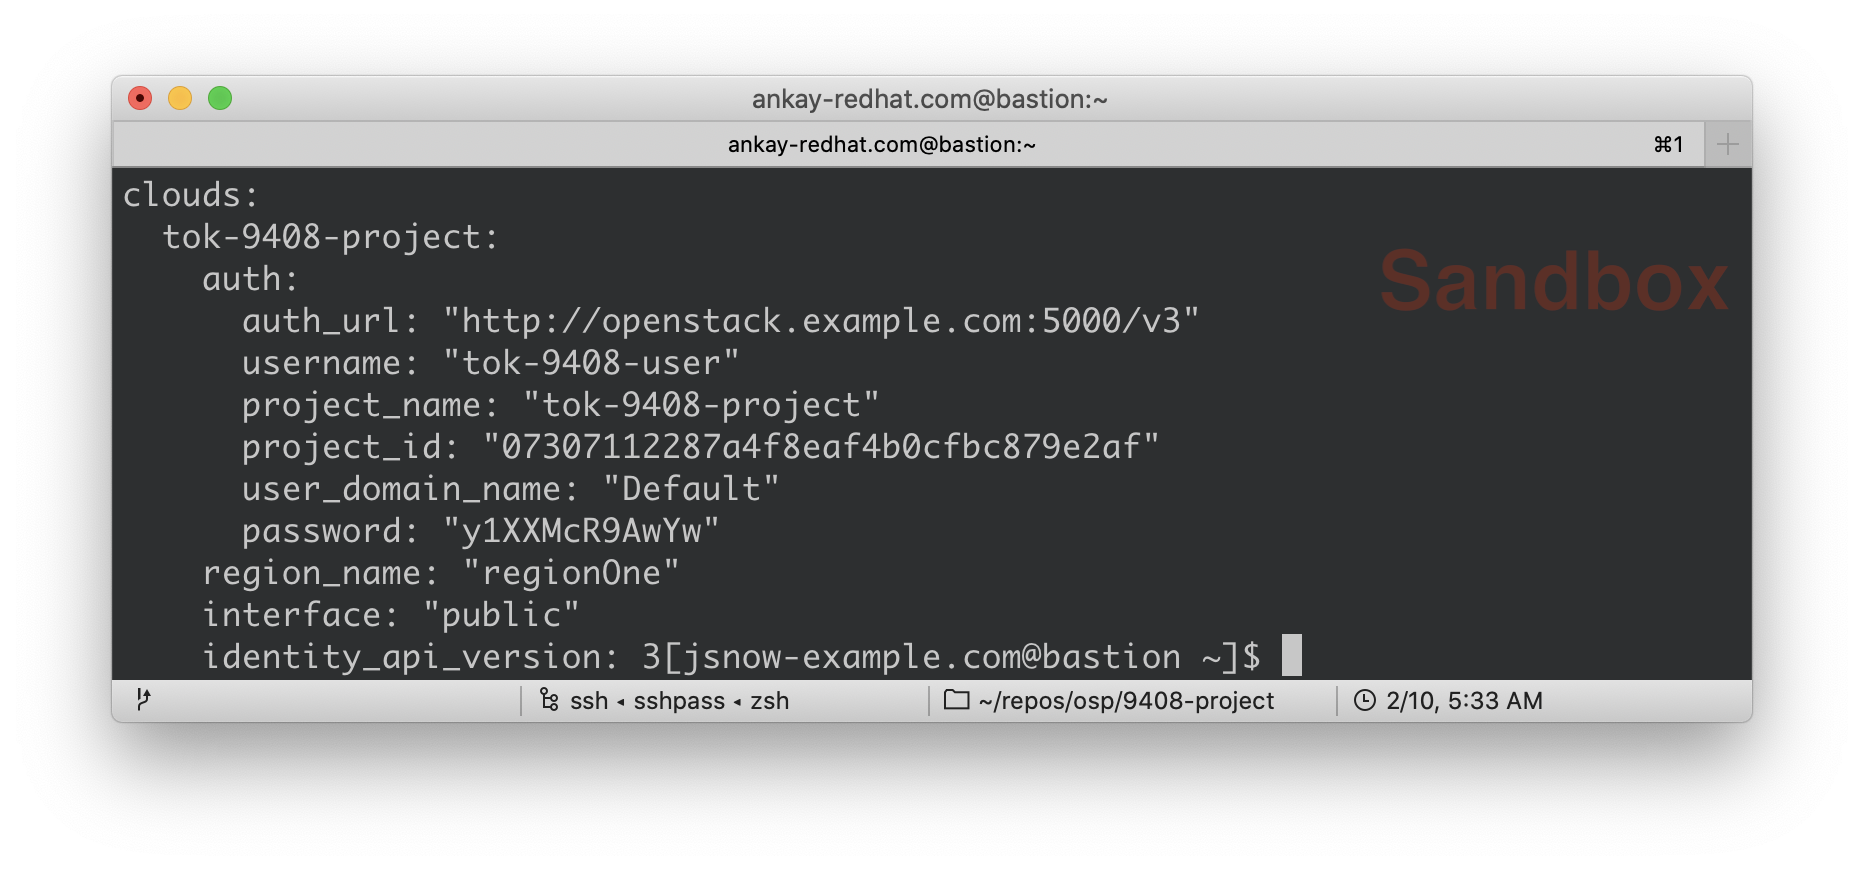
Overview Whilst this blog article/lab is aimed primarily at Red Hatters, and partners, who can self provision an OpenStack (OSP) Sandbox via Red Hat’s RHPDS it may also be useful to others working both with OpenStack and Ansible Agnostic Deployer aka AgnosticD. I’ll follow this up, shortly, with a second blog article repeating the same exercise but deploying from a laptop running Linux or macOS.
I’ll assume you have either self provisioned, or been provided with, an OpenStack Sandbox instance and have the necessary ssh login details etc.
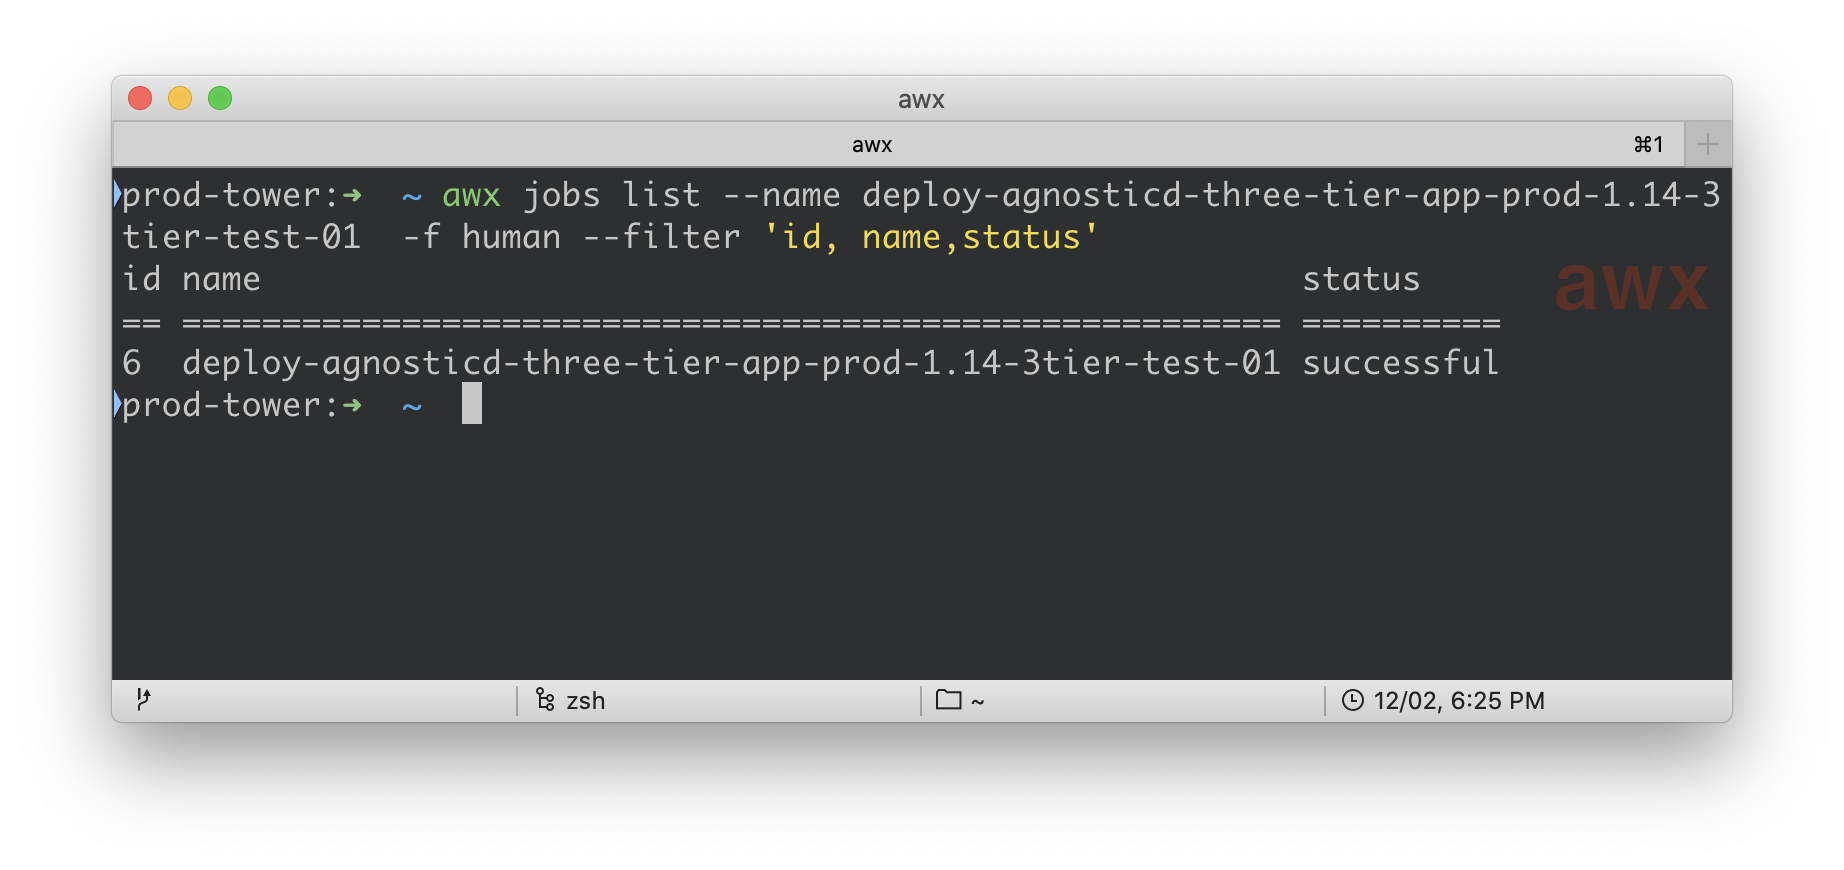
Overview Whilst I’m a big fan of Ansible Tower’s UI and the overall User Experience I generally try to avoid spending time in it these days. If you spend a lot of time clicking in an automation tool you’re probably "doing it wrong" IMHO!
Up until Ansible Tower 3.6 we have been using a mix of tower-cli, Python based API calls, and Ansible Playbooks to automate our use of Tower and in particular job launching.
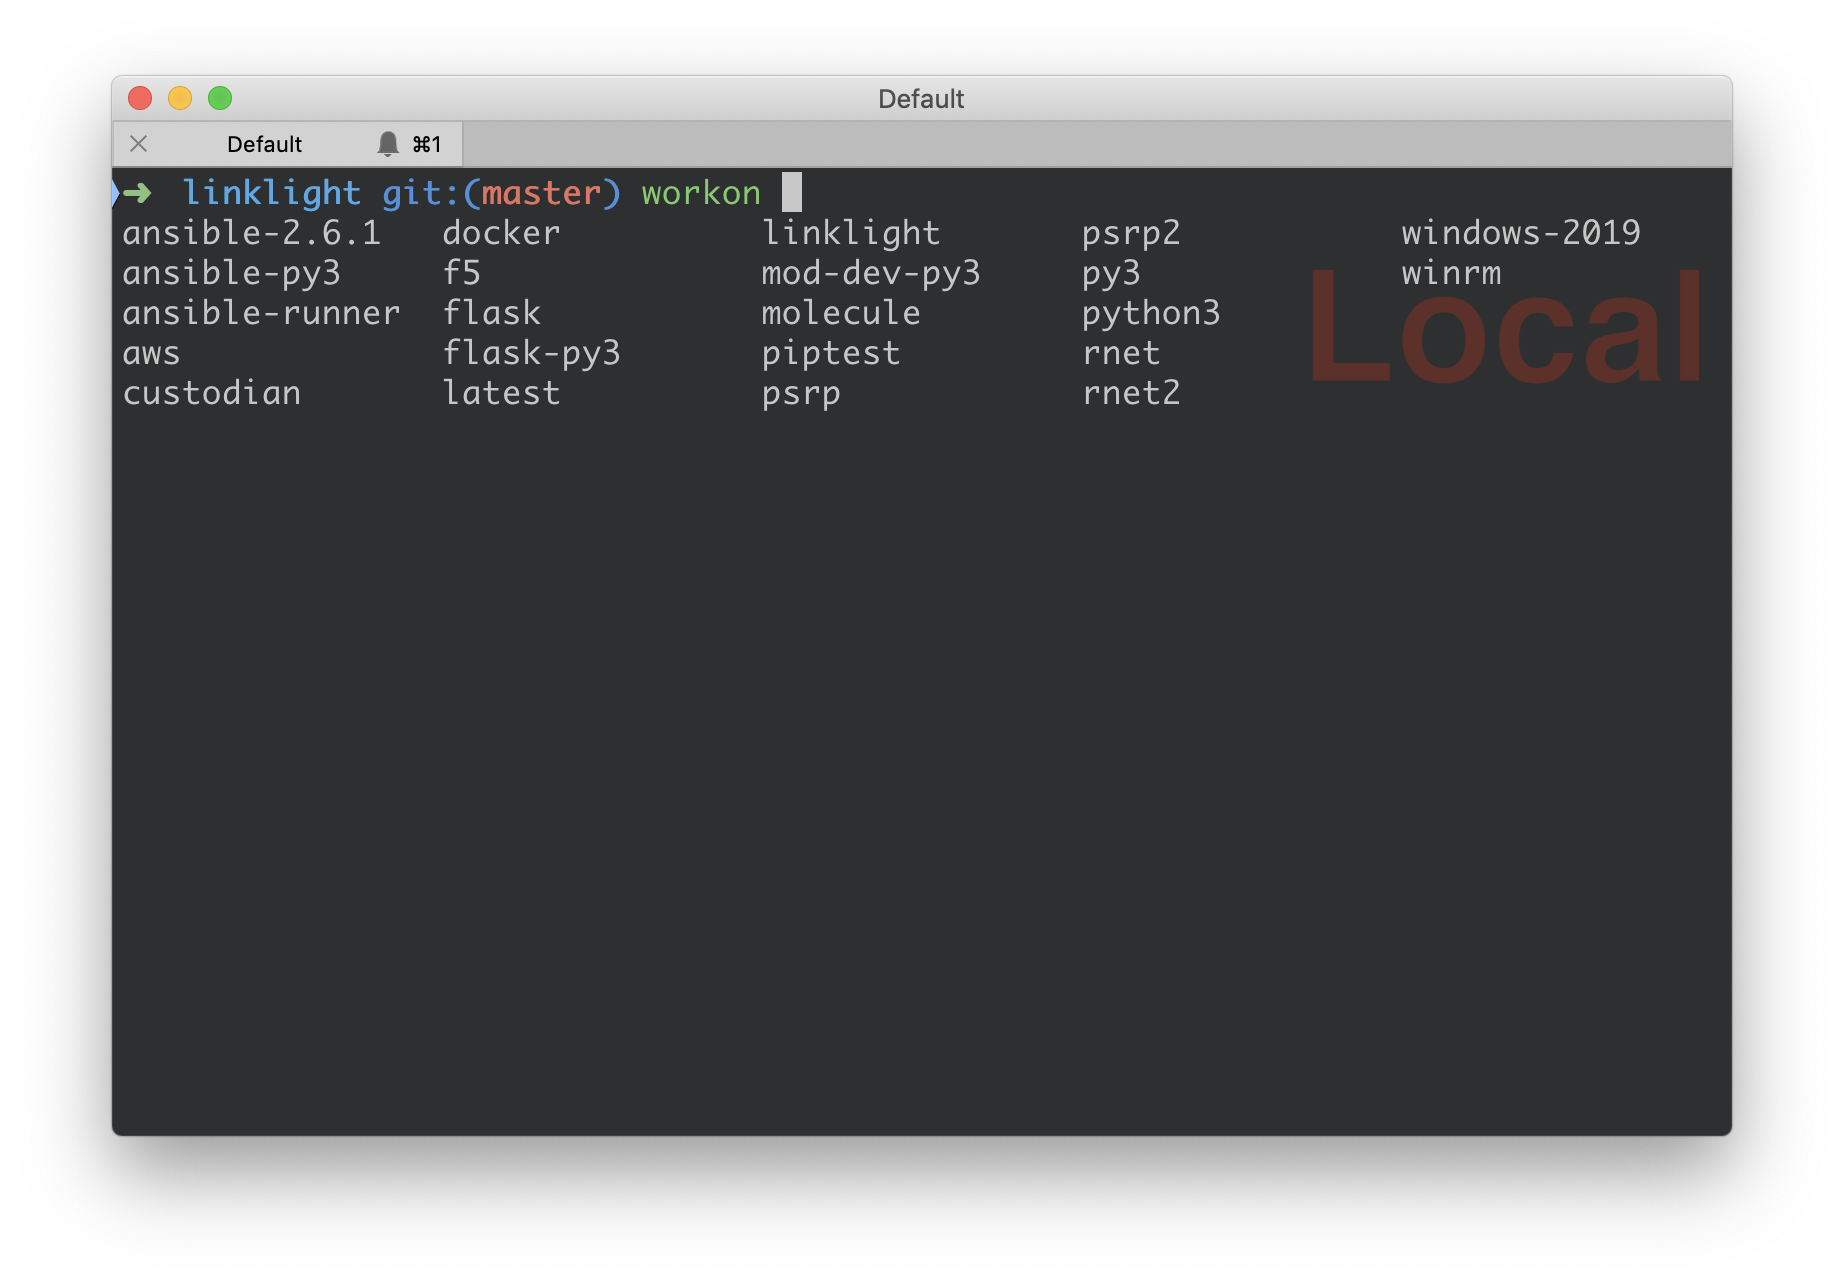
Overview Virtualenvs make considerable sense, discussed in more depth here, in any complex python or Ansible environment. In the HOWTO, or lab, we’ll quickly get a python 3 virtualenv up and running on a RHEL or CentOS system.
This article is written making use of one of Red Hat’s Lab Environments running RHEL, in this case on AWS, however this should run fine on CentOS standalone systems. Obviously your repo configurations may vary so adjust to taste, I’ve assumed a pretty minimal install and have opted for CentOS available repos.