Running Podman Machine on the Mac M1
TL:DR
Patch and compile qemu on the Apple M1 to run podman machine smoothly and without errors. If you are in a hurry you can simply copy and paste your way through the code snippets below but be aware you are making changes to your toolchain and qemu.
Overview
Since I use both podman and docker frequently on a mix of x86 and ARM I was very happy when podman 3.2.3 added support for podman machine.
Just like docker machine makes it simple to run docker on Mac transparently via a VM, podman machine promises the same functionality for podman.
After installing it on an x86 MacBook Pro it worked first time smoothly however on my preferred machine, an Apple M1 MacBook Air running the latest beta (5) of MacOS 12 Monterey, it was not so so easy, and I saw 2 different errors during my early attempts.
I recommend you try first with a simple brew install podman qemu or use brew upgrade if they are already installed.
If that fails, read on.
This article documents the steps I took to get it running smoothly and without errors.
Warning
If you already use qemu on your M1 you may risk breaking it :) So proceed with at least awareness.
On the other-hand the steps below worked well for me and may in fact enhance qemu on your M1.
In a worst case you can either delete your qemu install and reinstall via brew install qemu.
In fact you will see you can actually run 2 different versions of qemu on your M1 if you want by omitting the final sym link step and run podman machine with your new, non brew installed, qemu by editing the paths in ~/.config/containers/podman/machine/qemu/podman-machine-default.json
Steps
-
Install the necessary toolchain to build qemu locally
-
Clone and Patch qemu locally
-
Build, Install and Sym Link
-
Run podman machine
1) Install the toolchain
First, make sure you have the Xcode CLI tools available (compilers and associated toolchain).
xcode-select --installNext, install pre-requisites for building qemu.
At least parse this line and consider if it may impact your existing toolchain.
The new one, to me anyway, was ninja, a make like utility.
brew install autoconf automake gettext glib libffi ninja pixman pkg-config2) Checkout the qemu Source Code and Patch
In this section we are going to checkout the source for qemu and patch with a fix for macOS’s hypervisor framework.
This could well become unnecessary soon, or not.
I tried several times to unsuccessfully patch and build and after reading several threads (see Resources at the end.
I’m not a qemu guru and here could be a more optimal way to do this).
git clone https://git.qemu.org/git/qemu.git
git checkout 3c93dfa42c394fdd55684f2fbf24cf2f39b97d47
Apply the hypervisor patch which will allow the hvf accelerator to work.
You can of course download and read the patch to get a.
clearer idea as to what is going on.
I am assuming that this code will be merged into the main branch at some point as Apple silicon gets richer support.
curl https://patchwork.kernel.org/series/485309/mbox/ | git amYou can always download the patch above if you want to read what is going on.
3) Build, Install, and Sym Link
Next build your customized and patched qemu.
mkdir build # Assumes you are in the root directory of your qemu repo clone
cd build
../configure --target-list=aarch64-softmmu --enable-hvf --enable-cocoa  --disable-gnutls
Lets briefly look at the configure options, remember I’m not a qemu guru
-
—target-list=aarch64-softmmuWe are only building for ARM, so no x86 emulation etc -
—enable-hvfThis enables thehvfhypervisor accelerator referenced by podman machine-
gets rid of
qemu-system-aarch64: -accel hvf: invalid accelerator hvffailure
-
-
--enable-cocoaStrictly speaking this I think is unnecessary for our use case but supports graphical guests -
—disable-gnutlsUses non GNU Utils toolchain components during the build process
After your build you can see the handful of binaries you have created with ls -ld qemu-*.
Next step is to install them.
sudo make installThis will place them in /usr/local/bin . However podman expects them in /opt/homebrew/bin or does at least on my machine.
This may well be an artifact of this being the home of my original qemu brew install when I first attempted to run podman machine init which is when this directory and config was created: ~/.config/containers/podman/machine/qemu/podman-machine-default.json
Either play around with tweaking that (podman machine rm;
podman machine init possibly - proceed at your own risk.
Or at your own risk warning hacky… sym link into the expected /opt/homebrew/bin
for f in /usr/local/bin/qemu*
do
	ln -s $f /opt/homebrew/bin
done
4) Run podman machine
Now hopefully you should be able to run podman machine without errors and with hvf acceleration.
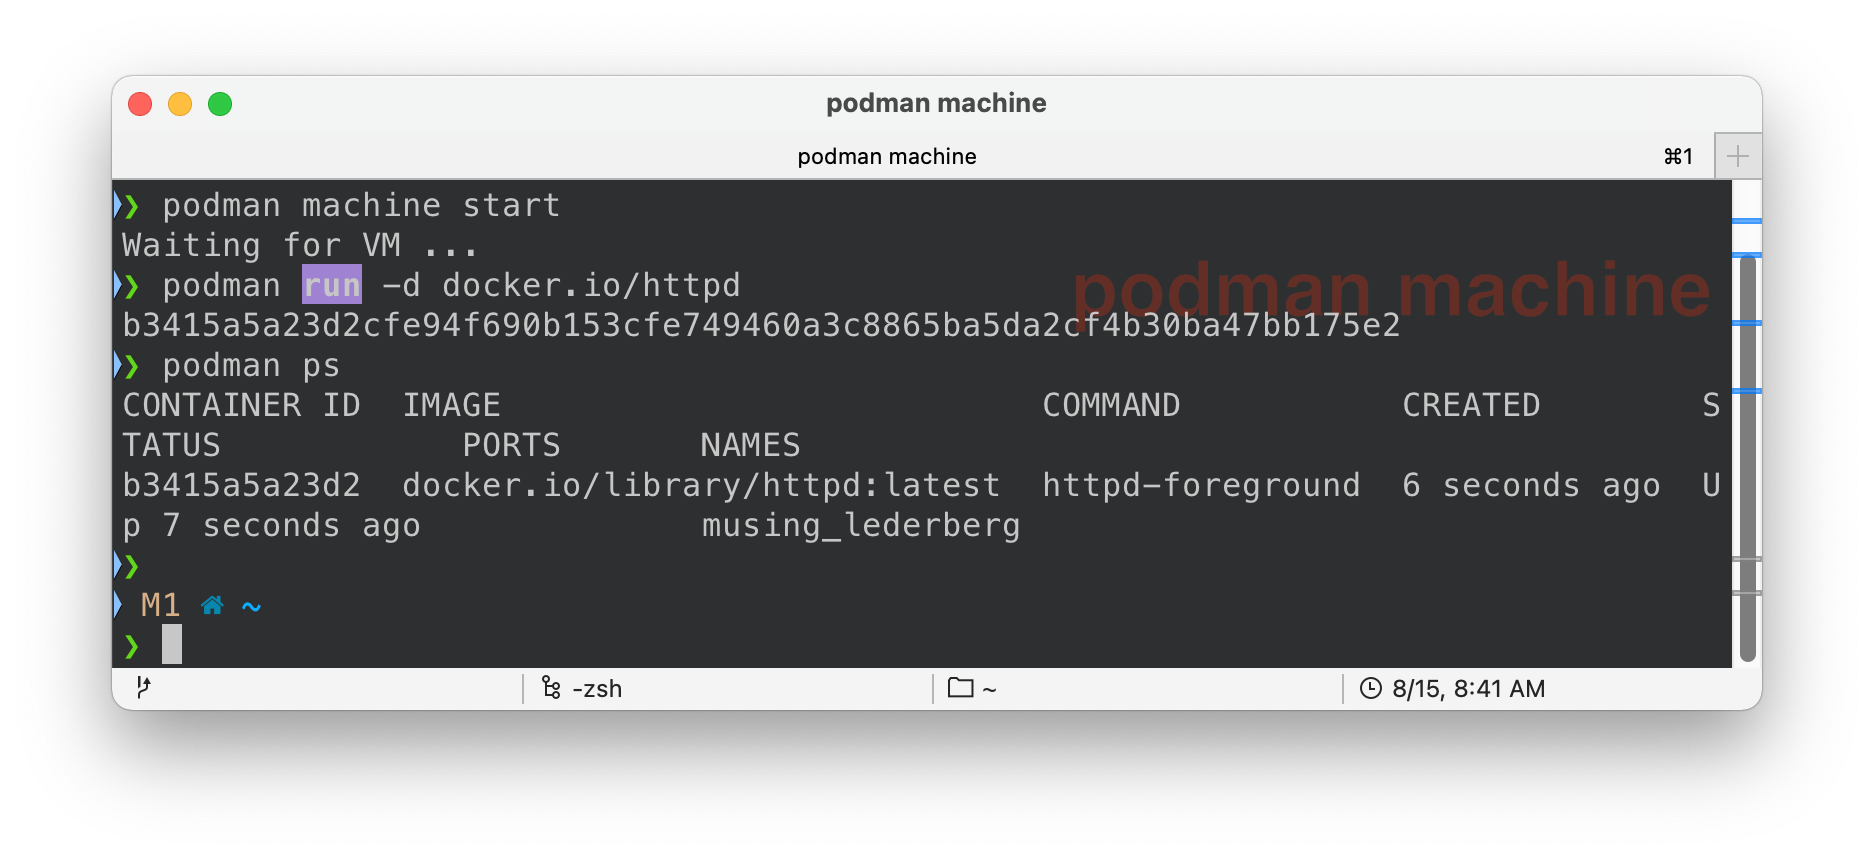
podman machine start
Waiting for VM ...
podman machine ssh
Connecting to vm podman-machine-default. To close connection, use `~.` or `exit`
Fedora CoreOS 34.20210810.dev.0
Tracker: https://github.com/coreos/fedora-coreos-tracker
Discuss: https://discussion.fedoraproject.org/c/server/coreos/

Last login: Sat Aug 14 19:40:00 2021 from 10.0.2.2
Or from your Mac try a simple run command such as:
podman run -d docker.io/httpd
19995b53f3eb55261fdd928d25dc0024681babc23ffbf572c00acb81ed508742
podman exec -it 199 bash
root@19995b53f3eb:/usr/local/apache2#
Resources
The following were big time savers for me. I’ve worked extensively with both Type 1 and Type 2 Hypervisors over the years yet despite its ubiquity and its role in VirtualBox etc I’ve never really dived into qemu before, these threads and articles helped.
NOTE Much of the content below dates from the early days of the Apple M1 and also the excellent ARM/x86 Blog Article deals with running x86 on ARM. In our case we are running an ARM VM so that is a significant difference.